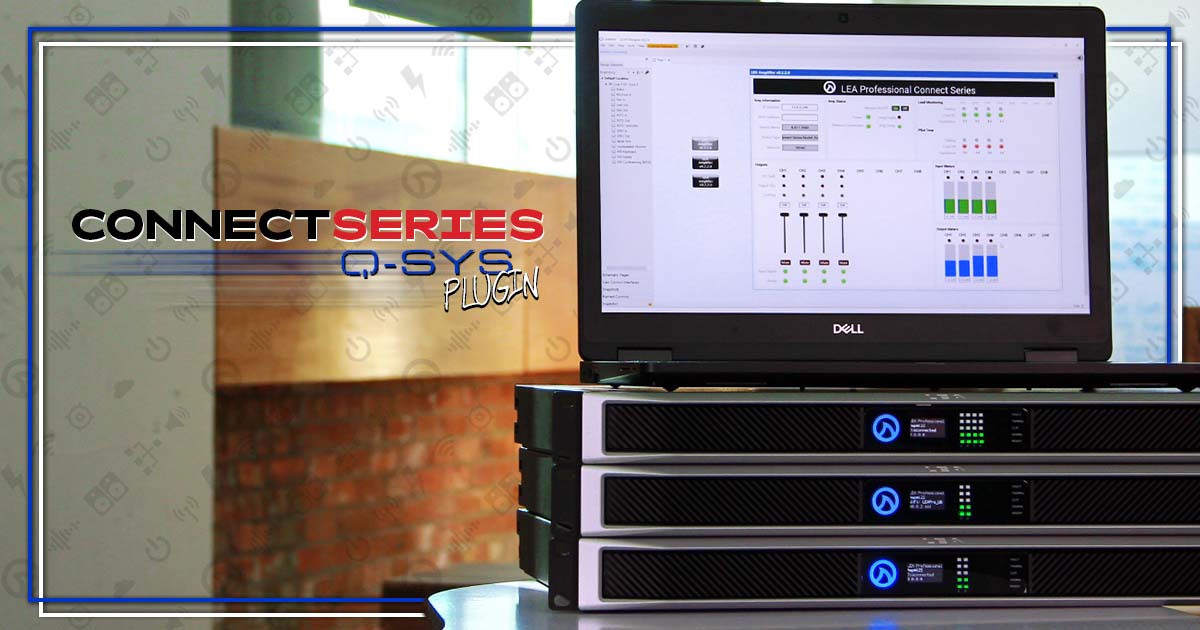
The CONNECTSERIES amplifiers offer limited control and monitoring capabilities through QSC’s Q-SYS system through the use of the CONNECTSERIES Q-SYS Plugin.
To Download and configure the Q-SYS plugin, follow the steps below.
How To Configure And Use The CONNECTSERIES Q-SYS Plugin
First, download the CONNECTSERIES Q-SYS Plugin to your PC from the link below.
Go to the folder where the file was downloaded and un-zip the file.
Double click on the file to install it
Open Q-SYS Designer
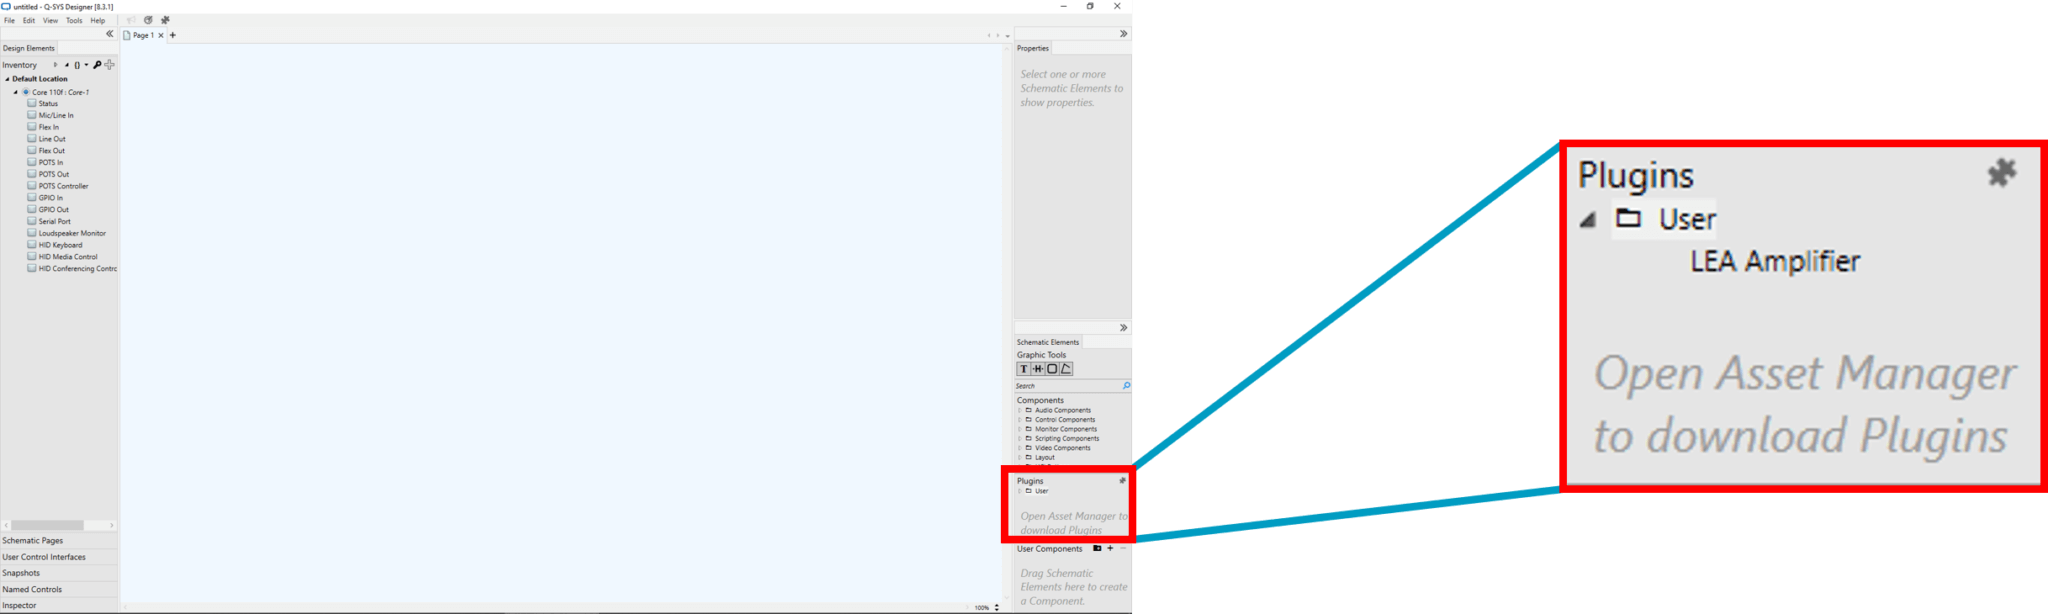
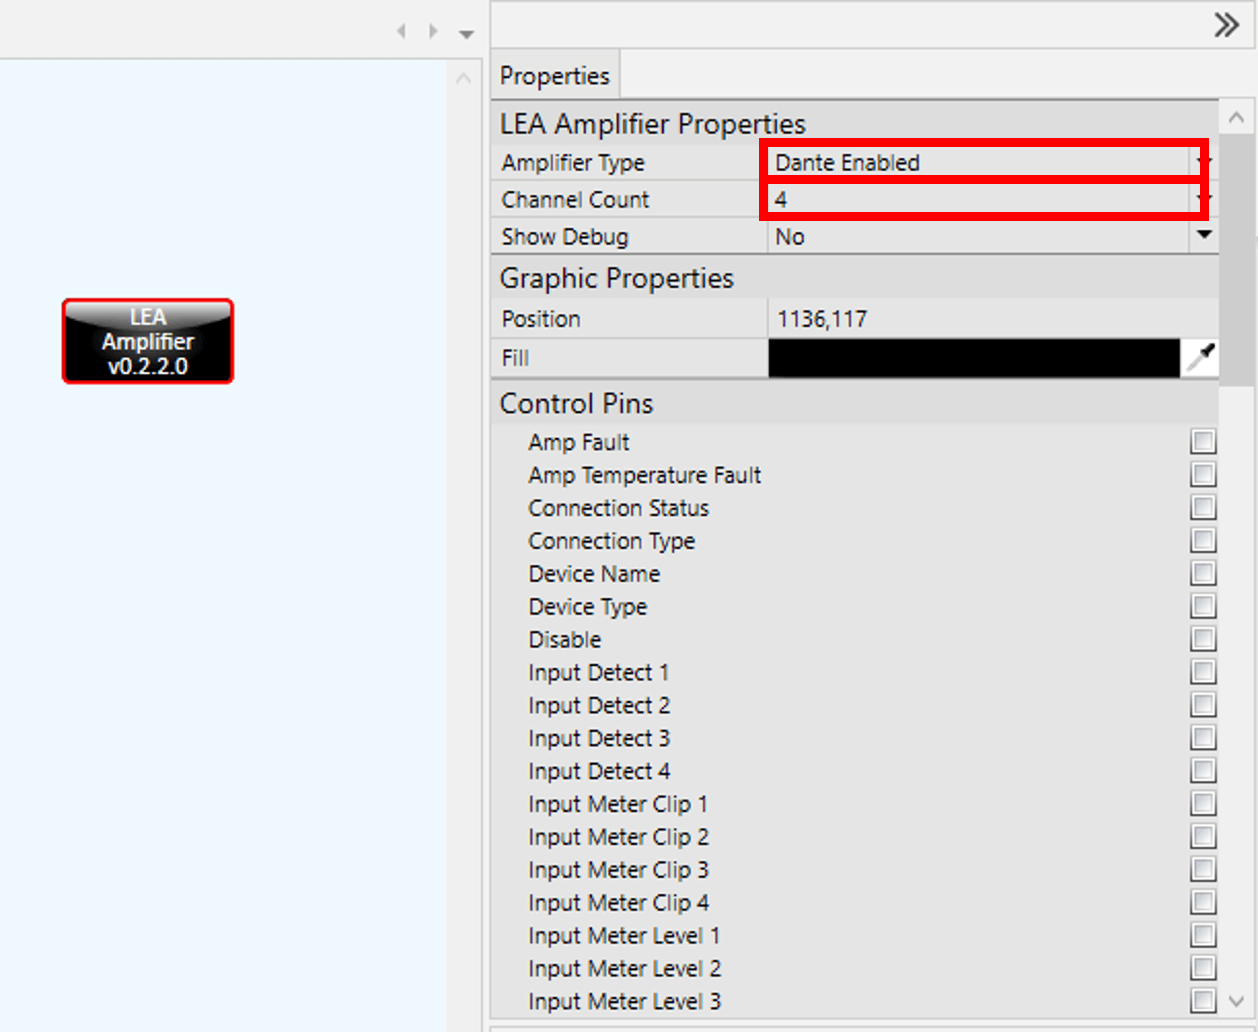
Navigate to the bottom right of the screen to the “Plugin” section and expand the “User” folder. Here you will find the newly installed “LEA Amplifier” plugin.
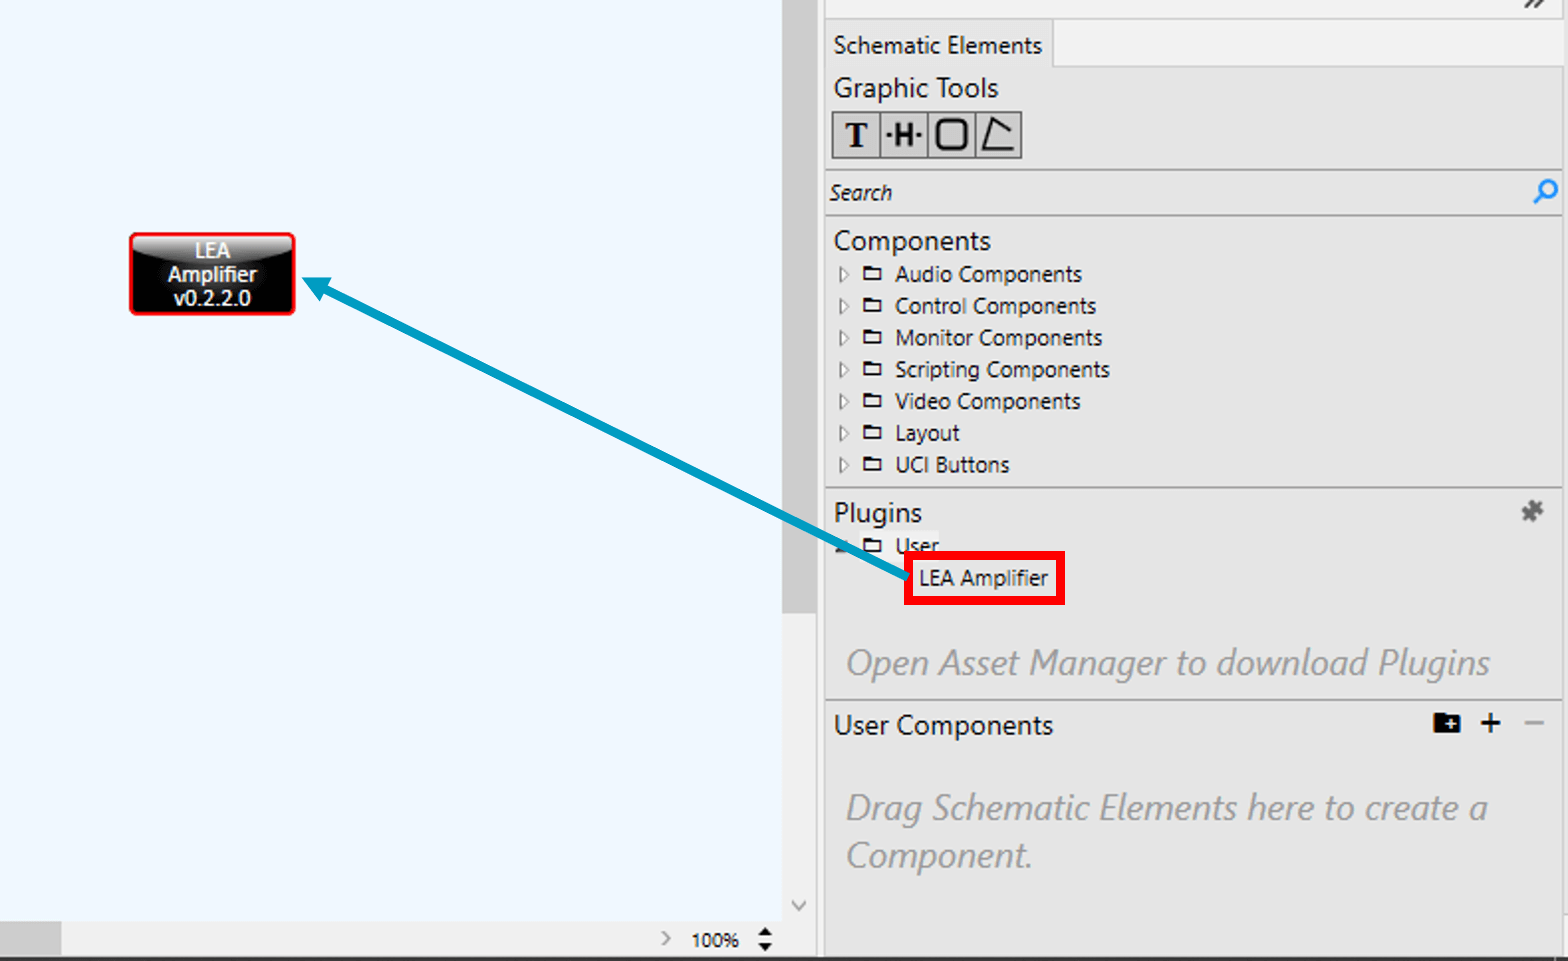
Click on the “LEA Amplifier” and drag it over to the design page
With the plugin selected adjust the properties for the correct number of channels and if the Amplifier is a Dante Connect Series or not.
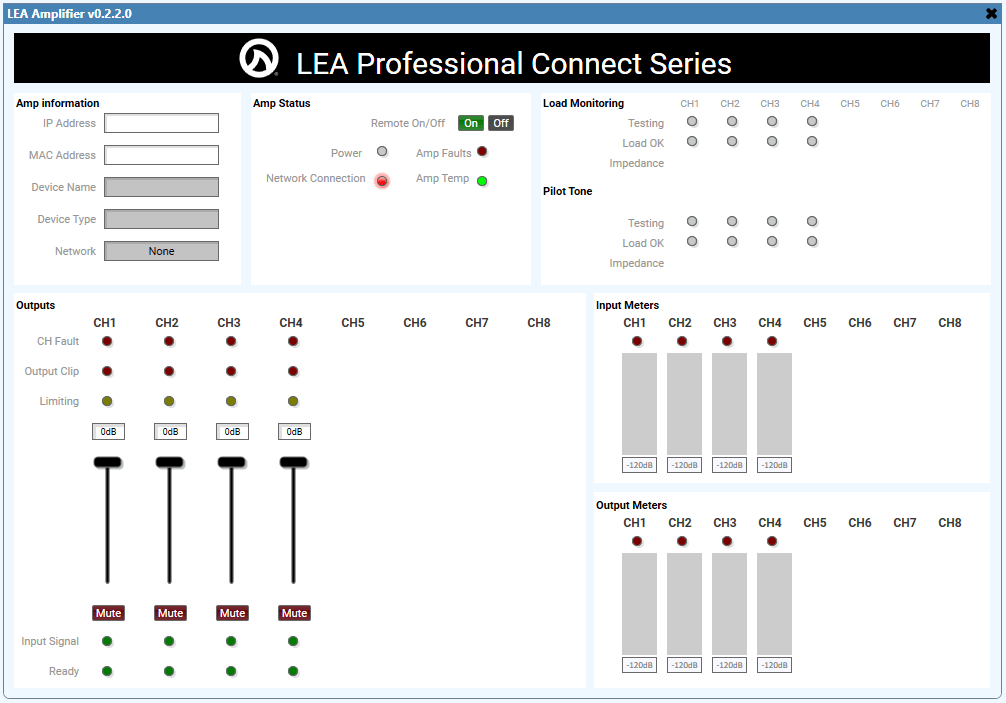
Click on the “File” drop down menu and select “Save to Core and Run” or just press the F5 key on the keyboard. Now double click on the plugin that was added to open the control window.
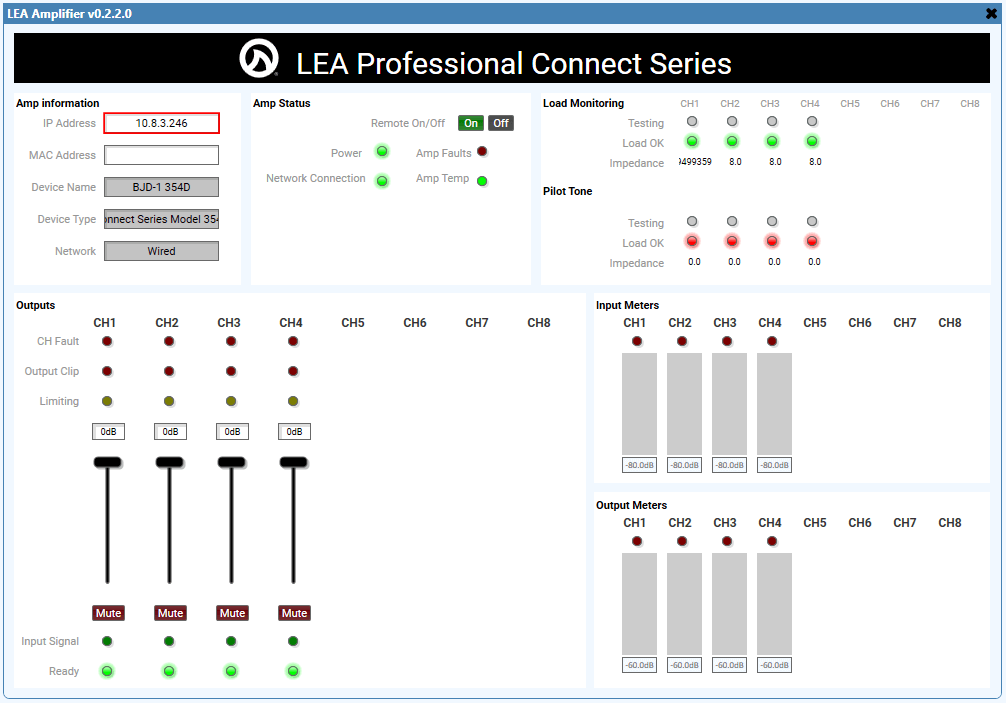
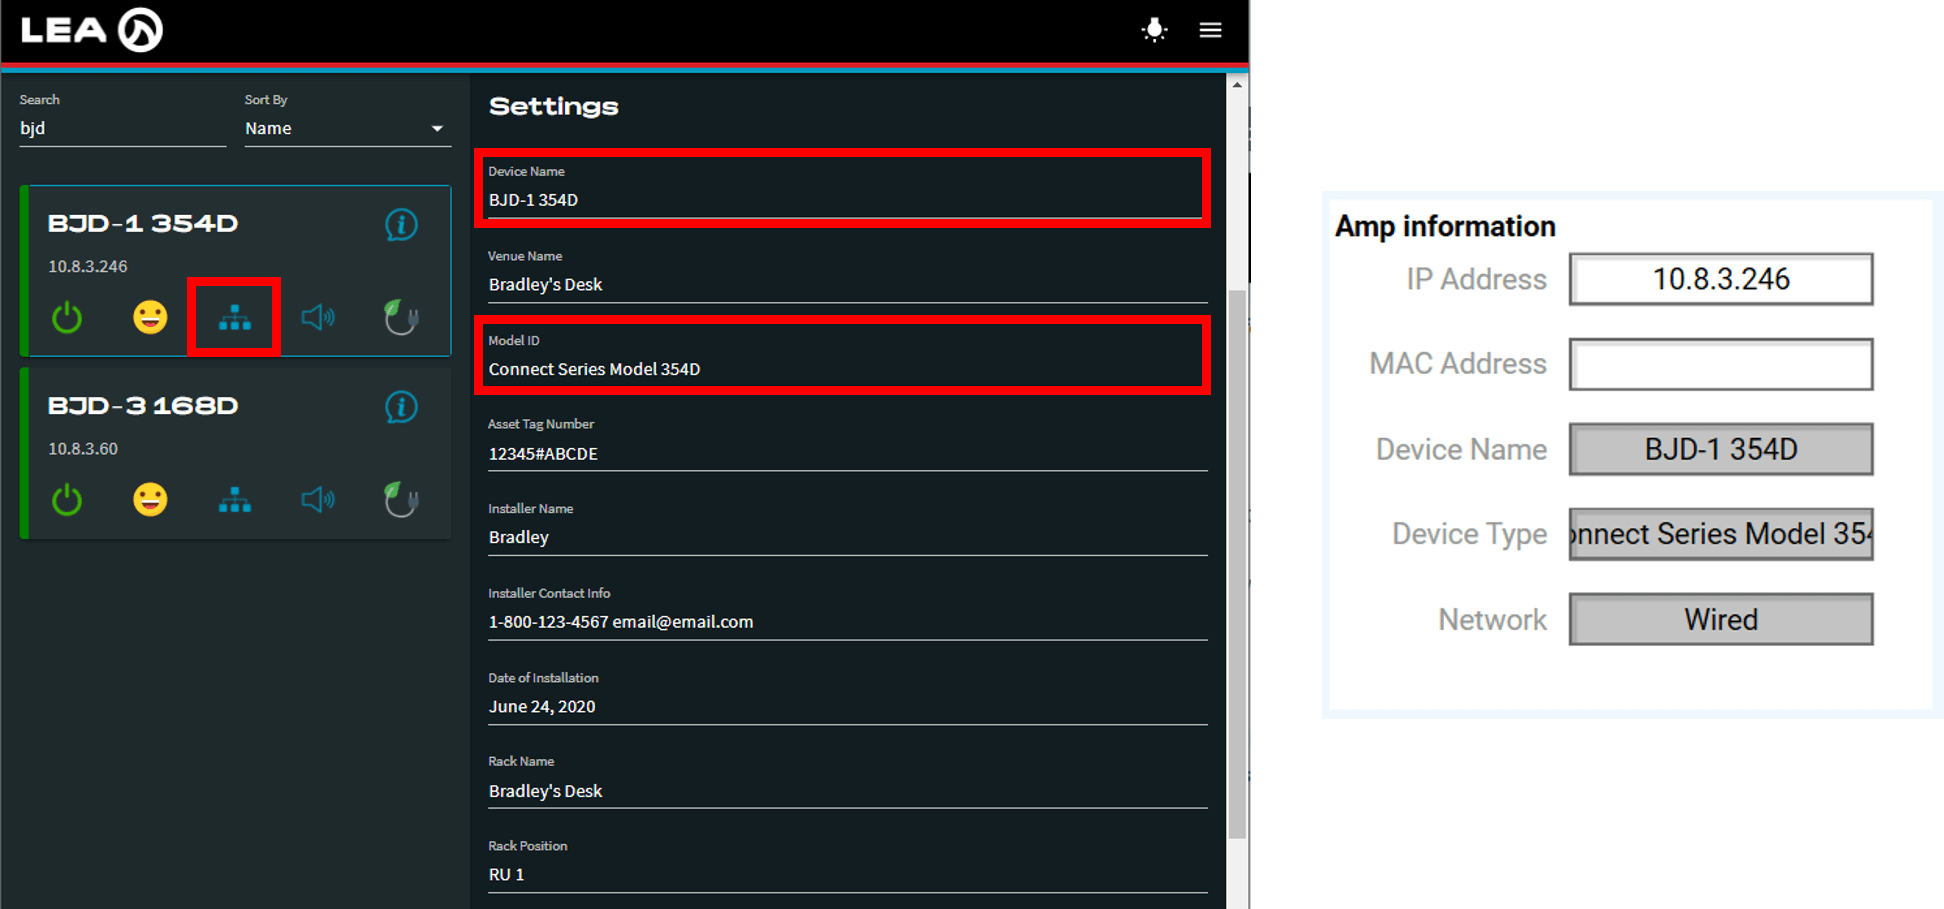
Click on the IP Address field and type in the IP address for the amplifier that you want to associate with this plugin and hit “Enter”. After hitting enter the plugin will populate all fields with the correct information and you can control and monitor the amplifier. To add more amplifiers just add more plugins to the design and associate all the amplifiers following the previous steps.
Amp Information displays some info from the Amp Settings Menu of the WebUI and will also display the network mode of the amplifier.
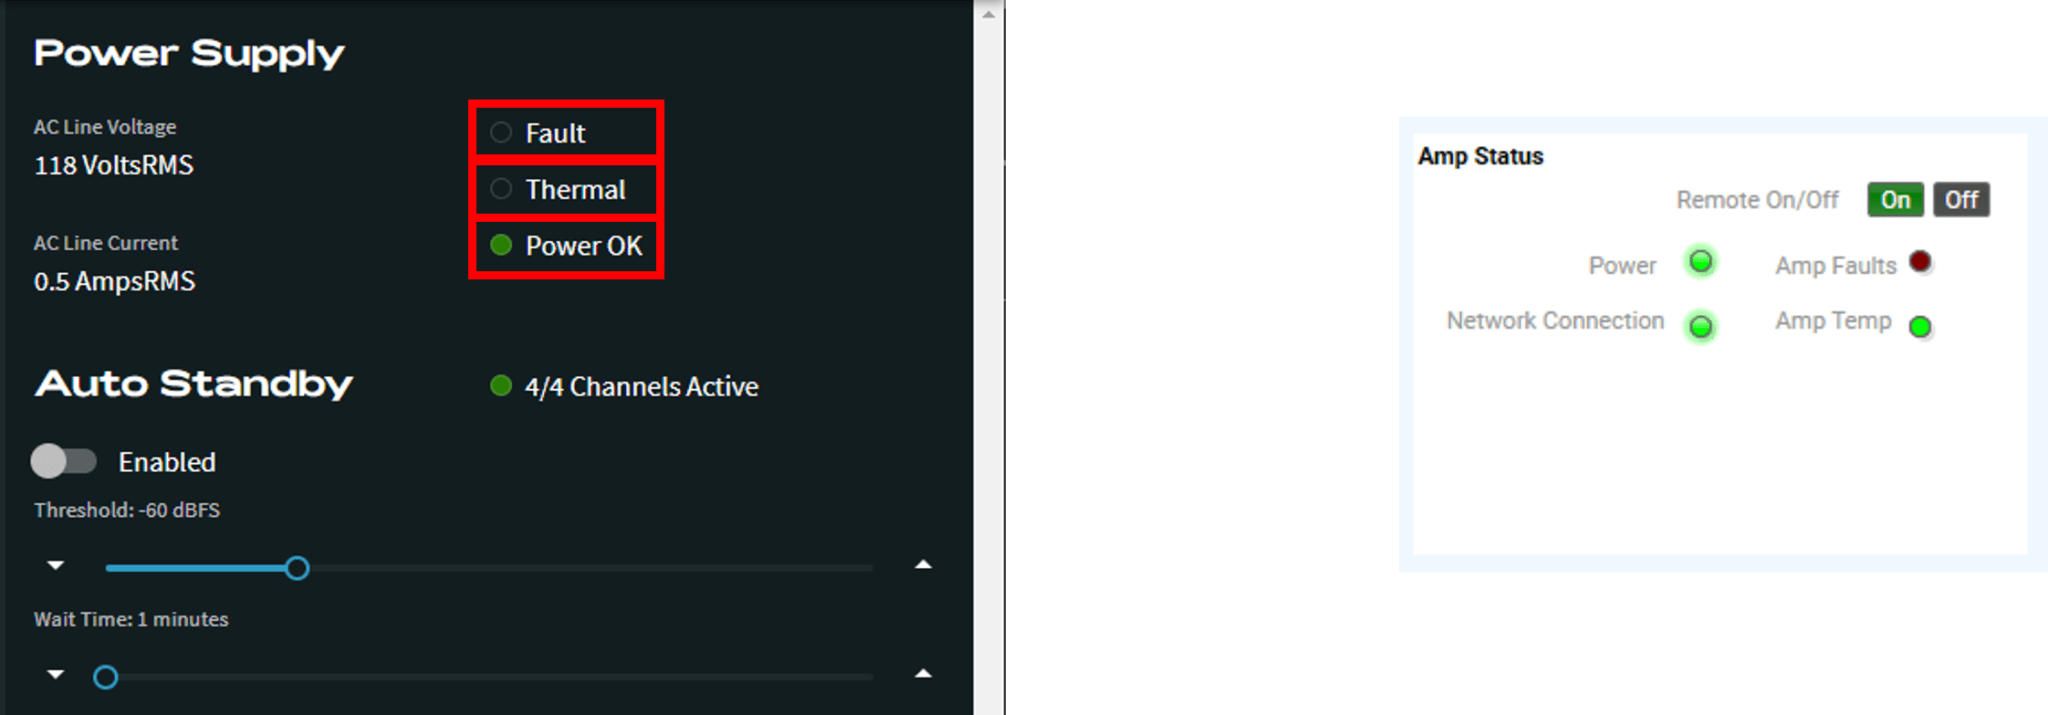
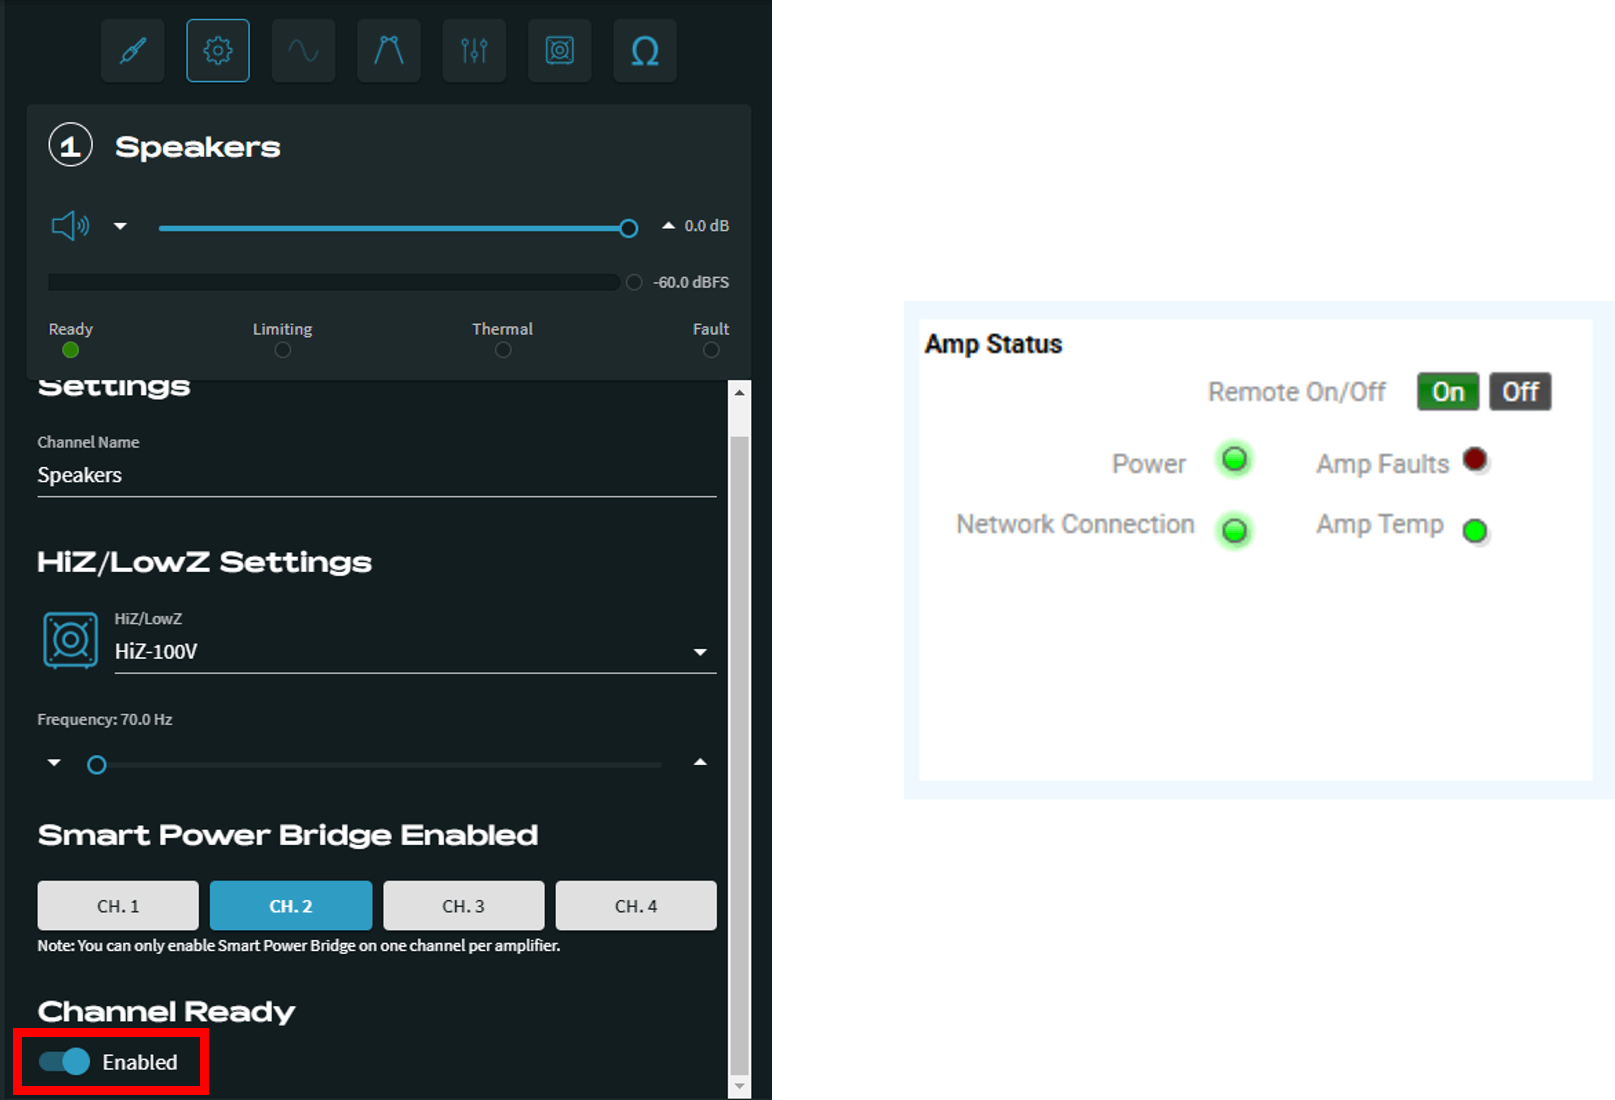
Amp Status section will display whole amplifier fault status and “Thermal” and “Power OK” status from the Power Supply section of the WebUI.
Remote On/Off will enable or disable the “Channel Ready” for all channels.
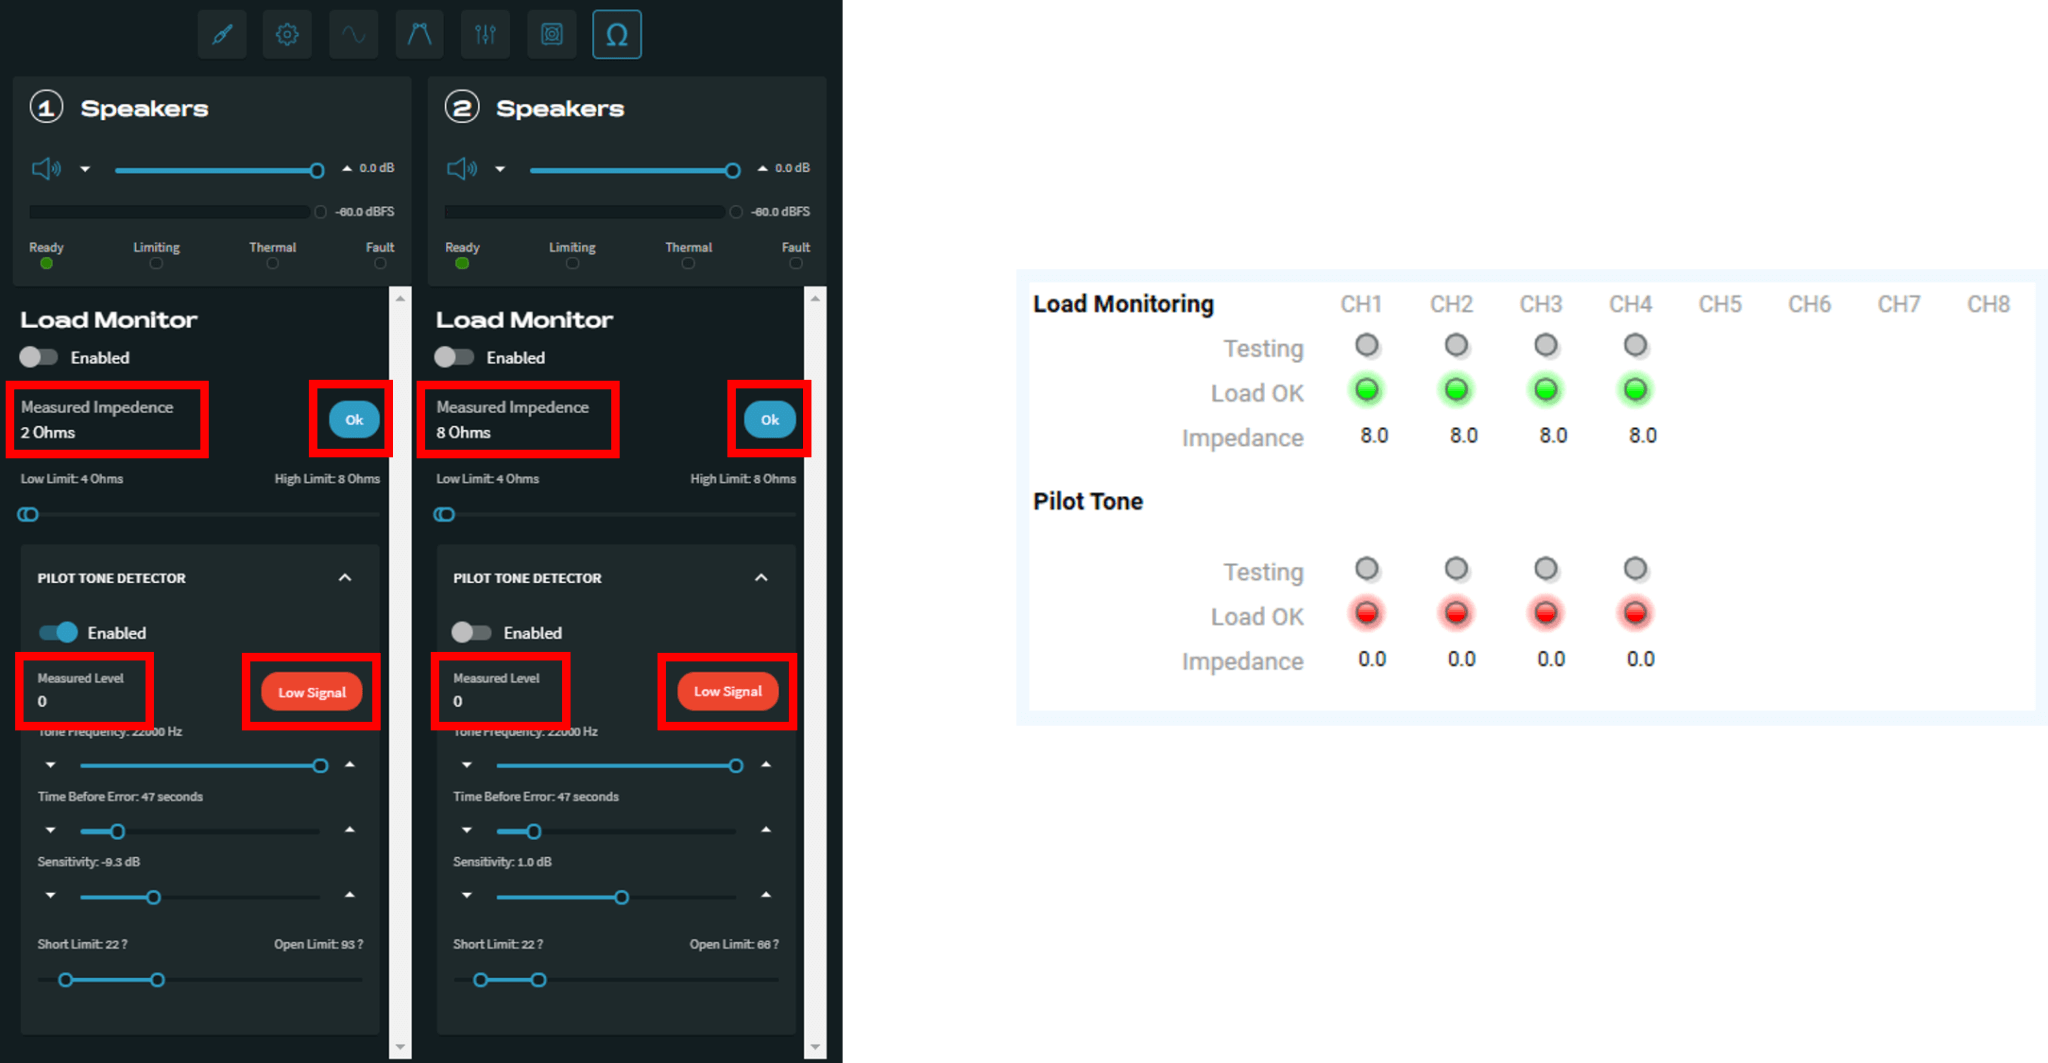
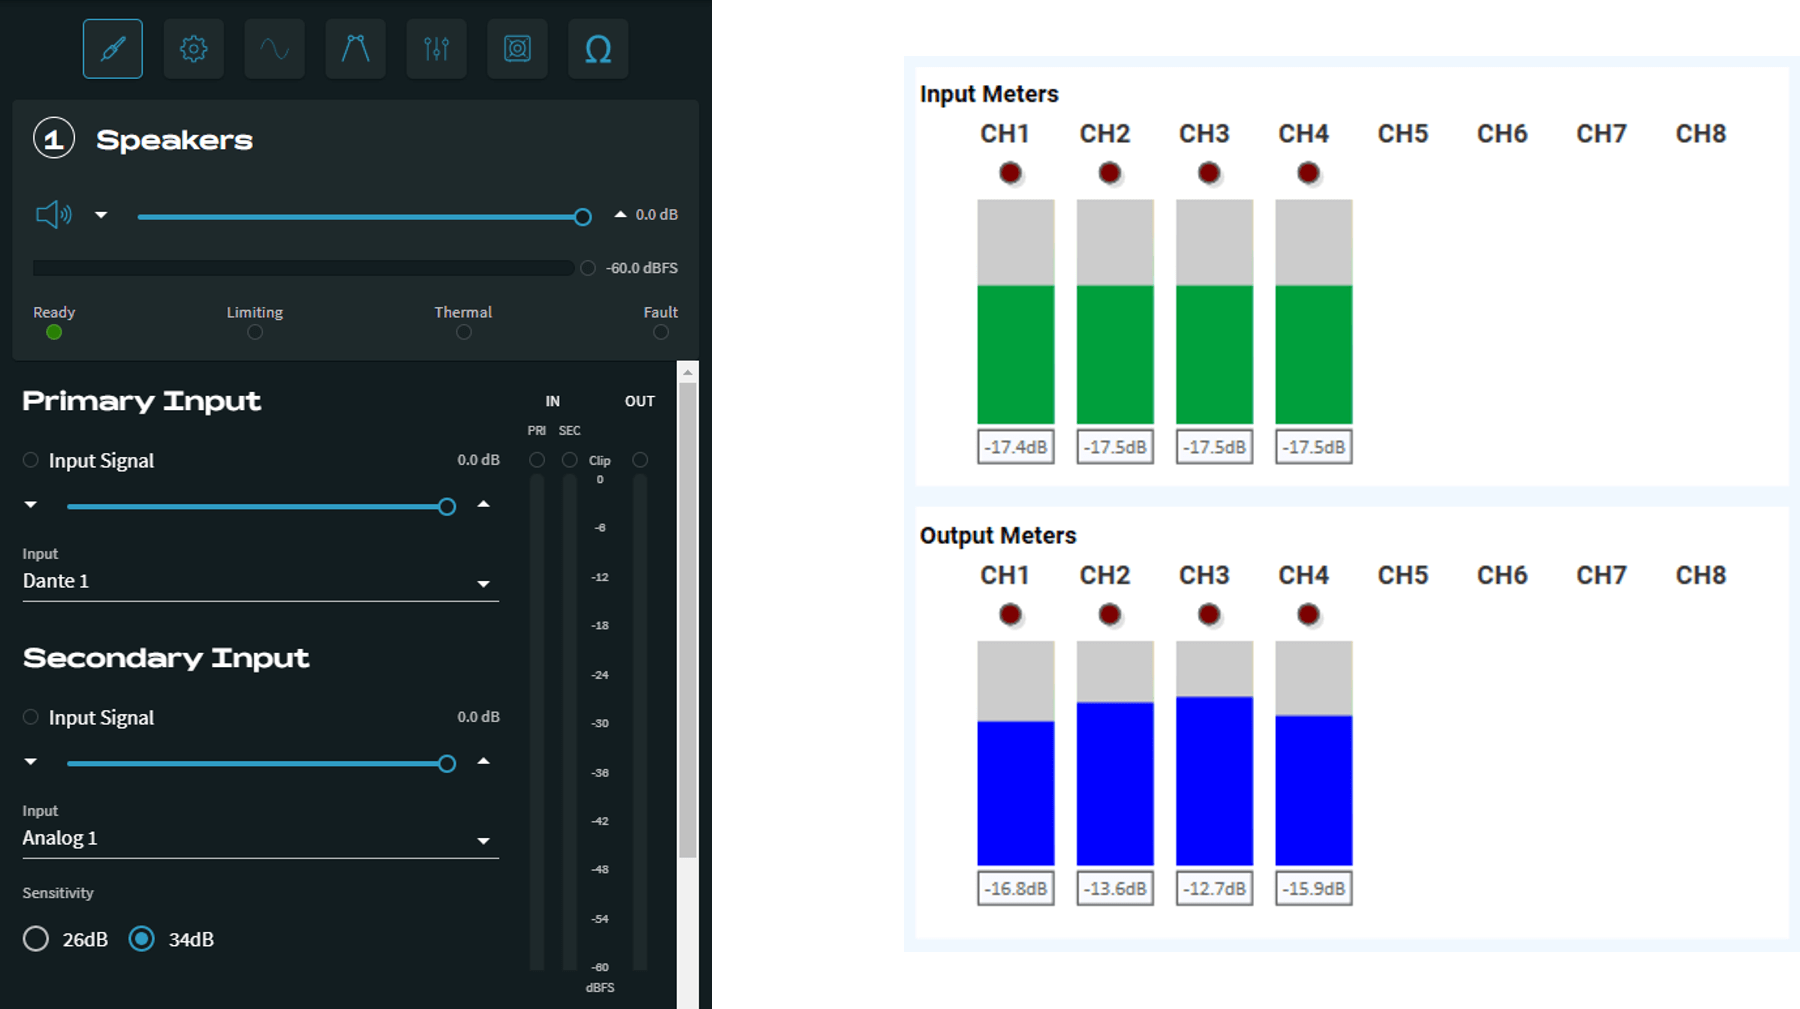
Displays important information from the Monitoring section in the WebUI
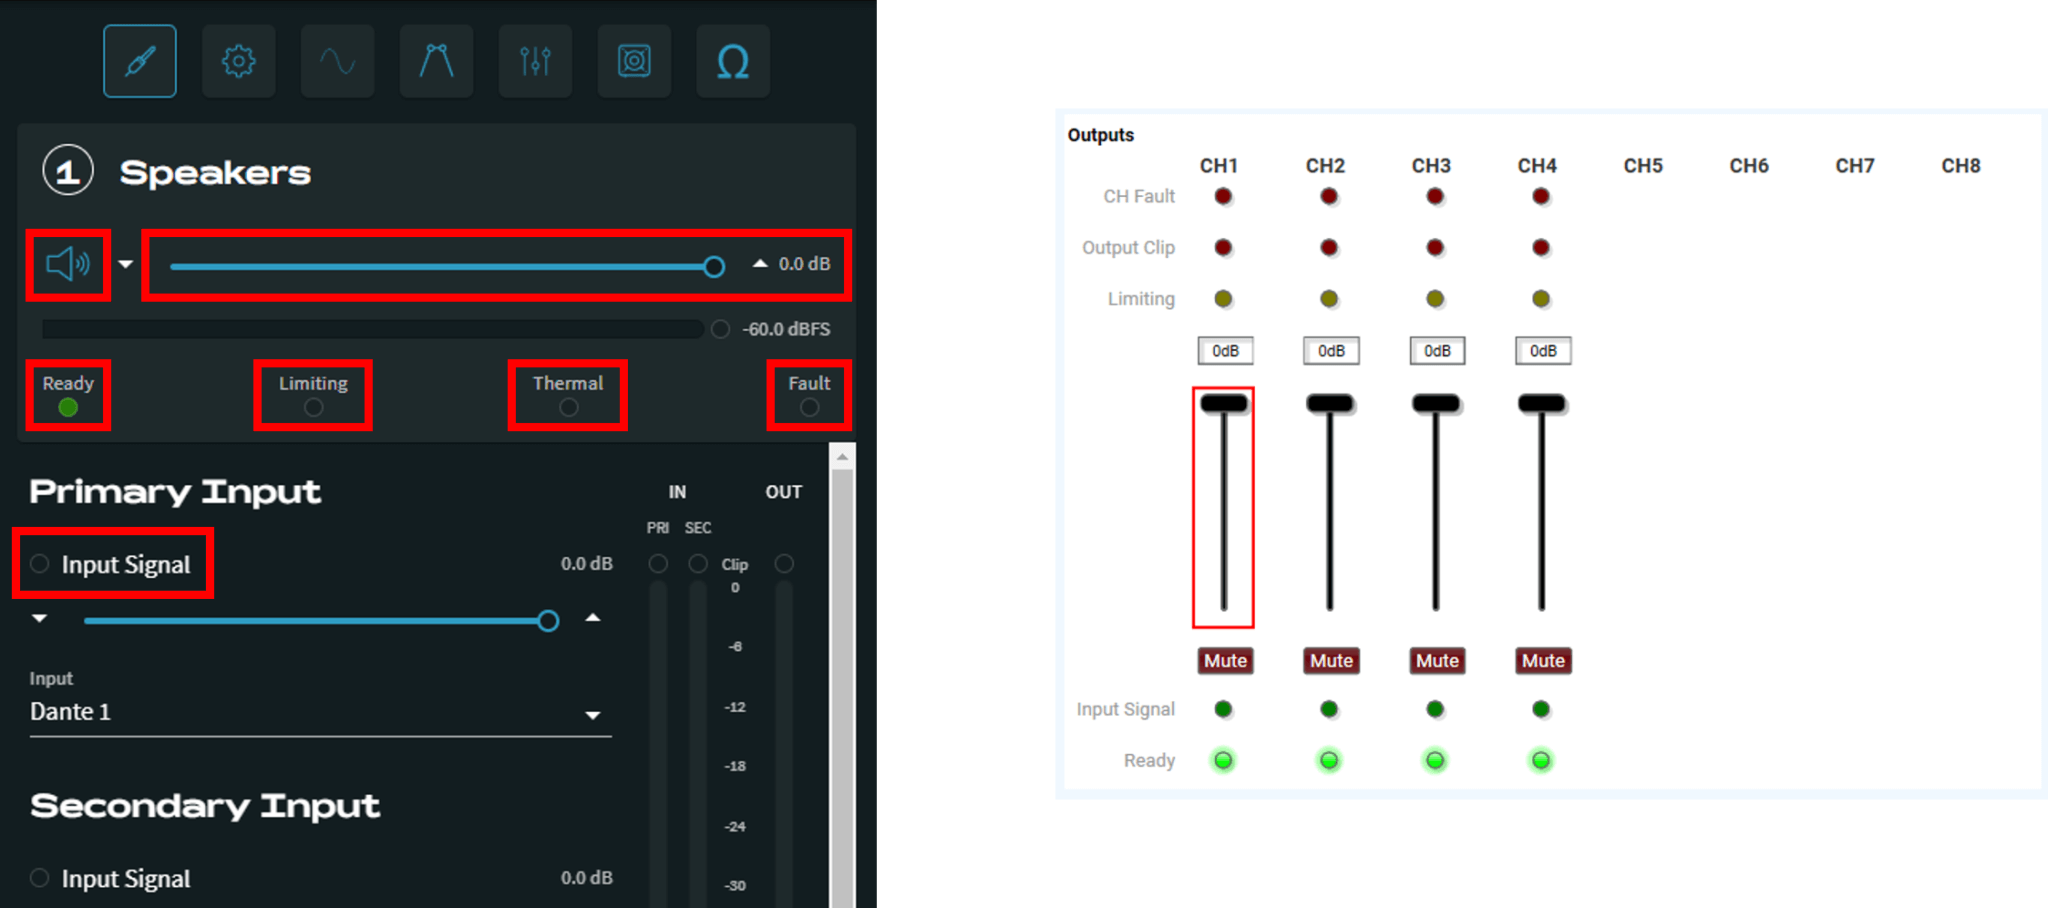
Output Channel Attenuation & Mute Control, Channel Fault, Output Clip, Limiter Status, Input Signal Presence, and Ready Status
Input and Output Level Meters with Clip Indication